
Epoxy Floor Installation: What to Expect
An epoxy floor is built through a series of linked steps. What the inspection finds drives the prep plan, the prep governs the strength of the bond, and the way curing is handled influences how the floor performs in service.

The Short Answer
Five stages make up the job: concrete inspection, grinding and cleaning, repair of visible damage, application of each coating layer in order, and curing. Your installer evaluates your slab in person and explains the specific plan for it before any work starts.
What Happens During Professional Epoxy Floor Installation?
These five stages happen in a set order, and each one prepares the slab for the step after it.
01
Evaluate the Concrete
It starts with your installer examining the slab on site. Moisture tests, a check for leftover sealers or coatings and a close inspection of the surface combine into a clear picture of the concrete, and that picture guides the coating recommendation as well as the amount of prep the floor will need.
02
Prepare the Surface
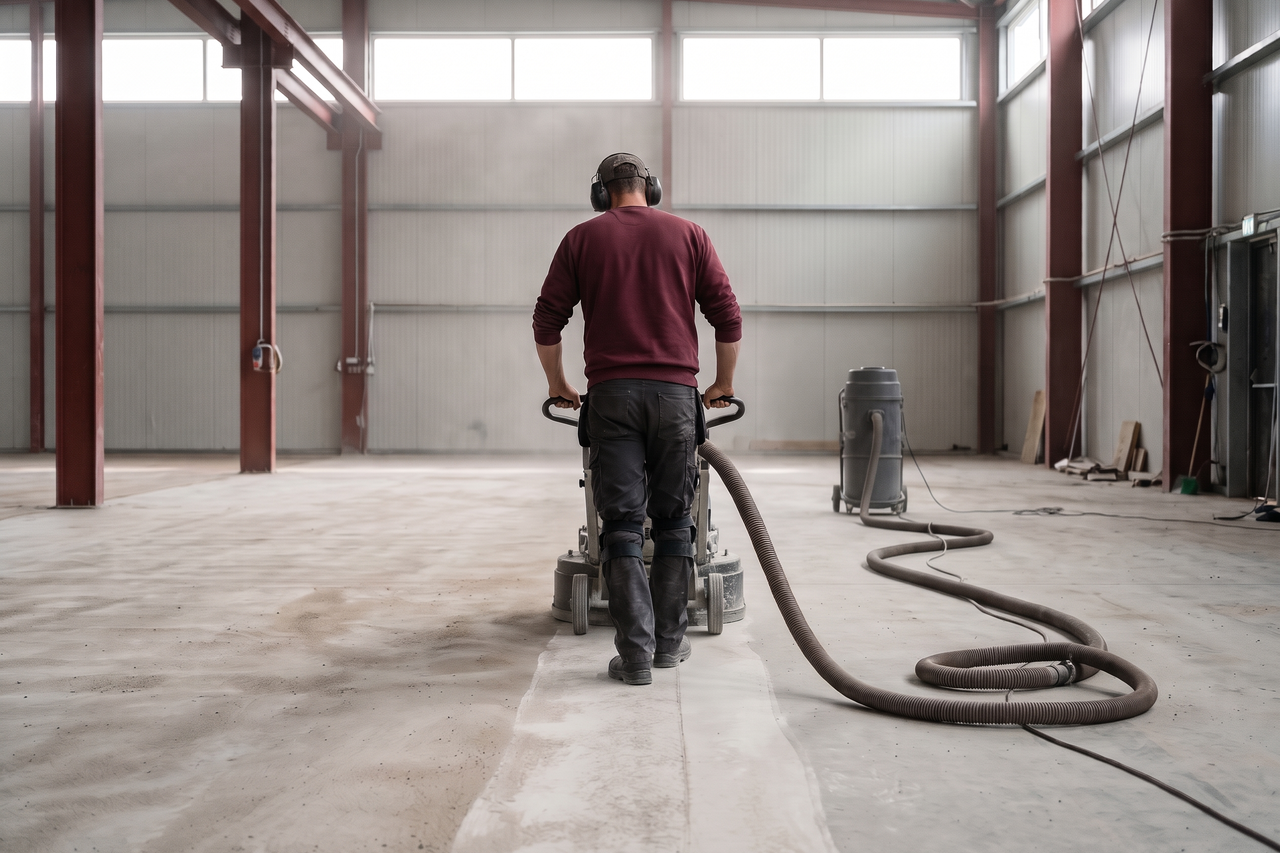
For epoxy to bond well, the concrete has to be opened mechanically so the material has texture to grab. Diamond grinding or shot blasting creates that profile by cutting away the hard, dense surface layer. The effort this stage requires depends on the slab’s past, any coatings already in place and whatever residue is clinging to it.
03
Repair Cracks and Defects
Once bare concrete is showing, the focus shifts to spalls, cracks and other defects. Repairing them before any coating goes on keeps every defect visible, so each can be judged and handled on its own terms.
04
Apply the Coating System
Layers follow the manufacturer’s sequence: primer, base coat, decorative broadcast if the design calls for it, and the topcoat last. No layer is added until the one below has reached its proper set condition.
05
Allow the Floor to Cure
After the final coat, the floor gains capability in steps. Foot traffic is allowed first, vehicles after that, and full chemical resistance at the end. Your installer walks through each milestone before the project begins.
What Makes a Professional Installation Different?
Two slabs that look the same from across the room may have little in common under close inspection. One might be hiding elevated moisture, leftover coating and active cracks; the other may be clean, sound and dry. A professional evaluation notices those differences instead of treating all concrete as one generic job.
An early coating failure usually has a traceable cause. Preparation is often part of the problem, alongside moisture, product selection and installation conditions. Careful attention to each of the four creates a better foundation for long-term performance.
Curious what your own slab needs? Share what the floor is like and how it gets used, then request a customized quote.
Why Concrete Preparation Matters
To dig further into grinding methods, crack repair and moisture testing, our concrete prep overview describes how each one is handled on a real slab.
Epoxy grips concrete through a mechanical bond. Grinding exposes the pores, and the coating flows down into that roughness and locks in. Concrete that is sealed, painted or polished slick offers almost nothing to hold onto, so any bond on unprepared concrete begins weak.
The amount of prep a floor requires comes from its past. Fresh, unsealed concrete is a world apart from a slab carrying old paint, adhesive or multiple sealer coats. Your installer defines the prep scope based on what the surface reveals, rather than applying a single standard to every slab.
Repairing Cracks and Surface Damage
Repairs are done while the slab is completely uncovered. Once old coatings are stripped and the surface is profiled, the real reach of each crack and weak area becomes clear, and each can be taken care of before primer hides it.
No two cracks are treated as interchangeable. A shallow, stable crack gets different handling from one that is spreading or has a raised edge. A crack that moves might need flexible filler or a more substantial fix, and your installer explains how each defect will be handled first.
Putting coating over an untreated crack only covers up the issue. The finish may start lifting along the crack line, and if the concrete keeps shifting, the crack can eventually reappear in the finish. The bare-slab stage is when defects should be dealt with properly.
Applying the Epoxy Coating System
If you want durability, sunlight resistance and application compared directly, read our epoxy and polyaspartic comparison.
With the slab prepared, the coats go on in sequence. Primer penetrates the roughened concrete and gives every later layer a steady base. When flake is part of the look, chips are tossed onto the wet base coat and settle into it ahead of the set.
The topcoat is what absorbs everyday wear from footsteps, dropped tools, tires and cleaning products. What the space demands decides which product is used, how many coats go down and how thick the film is, so a commercial floor carrying heavy machinery and regular chemical contact gets a different build from a garage that sees little use. Temperature and humidity are tracked from start to finish since each affects how the coats build and bond.
How Long Does Epoxy Flooring Take to Cure?
Wondering what drives the price of a coating project? Our epoxy floor pricing guide explains how the size of the floor, its condition and the chosen system shape the total.
A fresh coating becomes usable in stages rather than all at once. People can walk on it before vehicles return, and full chemical resistance comes after both. Loading the floor too heavily ahead of the right stage can cause marks or damage that are difficult to repair.
Full chemical resistance comes only after the coating has cross-linked completely through its film. A surface can feel solid underfoot well ahead of that point, so hardness to the touch is no proof of readiness. Ahead of the project, your installer explains the timeline; it depends on how big the floor is, its condition, the amount of prep and the system used.
Frequently Asked Questions
Q: What does the slab inspection tell you before the project starts?
The inspection shapes the whole project. Moisture tests, notes on any existing sealers or coatings, a review of cracks and a look at the current surface profile point toward the correct system and the prep the concrete needs. Lacking that information, any recommendation is just a guess.
Q: What goes wrong when the surface isn't prepared well enough?
A coating depends on the roughness grinding leaves behind. If that profile is shallow or smooth, or still holds remnants of old coating, adhesion suffers before a drop of primer is spread. Preparation is often part of the problem in early peeling, along with moisture, product selection and installation conditions.
Q: Is it OK to put a new coating over an old one?
Sometimes, depending on the coating already there. An existing coating that is tightly bonded, not lifting anywhere and compatible with the new material may be usable once it has been evaluated on site. One that is flaking or separating generally must be removed first. Your installer inspects the current surface and explains the options.
Q: How will I know the floor can handle foot traffic, vehicles and chemicals?
Before the project starts, your installer outlines each stage: when foot traffic is okay, when it is safe to park vehicles again and when the coating has reached full chemical resistance. How that progression unfolds depends on how large the floor is, its present state, the amount of prep and the system used.
Q: If the finished floor develops a crack, is the coating to blame?
A crack that shows up through a finished coating generally reflects movement in the slab below, whether from settling, shifting or moisture-related swelling, rather than a flaw in the coating material. A flooring professional can look at the crack, explain what probably caused it and advise whether it should be repaired.
Q: Do on-site temperature and humidity make a difference to the finished floor?
Yes. Coating manufacturers publish temperature and humidity limits for application and curing. Ignoring them can compromise adhesion and leave the coating setting unevenly, so your installer checks conditions before beginning and continues monitoring them throughout application.
Ready to Upgrade Your Concrete Floor?
Serving Kirksville, MO and surrounding areas. To request a customized quote, share some details about your concrete and how the room gets used.